- Home
- Learn
- Product guides
- Initial settings required for a Gira KNX Homeserver
Initial settings required for a Gira KNX Homeserver
When creating a project for a Gira Homeserver there are some minimum settings that need to be made before the first download.
1. Open the Experte program and create a new project. The filename must contain no spaces.
2. Open Project from the Master data tab on the left menu.
3. On the main Project settings tab select the Device Type based on the homeserver model being used.
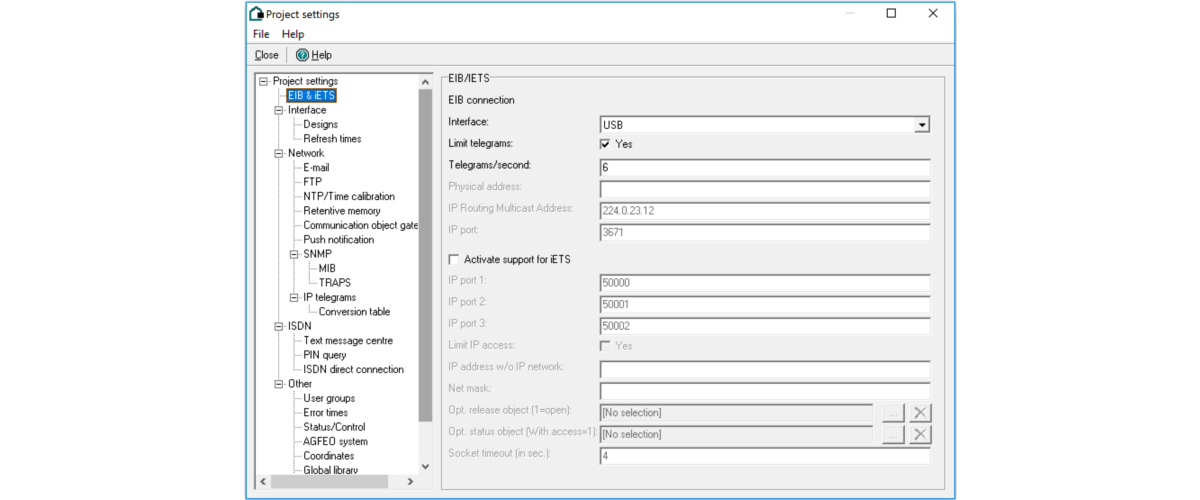
4. Select Project settings>EIB & iETS from the left menu.
The EIB Connection parameters define the link to KNX. A USB connection is recommended as it guarantees connection to the KNX bus even if the network fails. If an IP Router is used instead, change the interface to EIBNet/IP routing and assign a Physical address. This needs to be topologically correct i.e if the IP Router is 1.1.0 the homeserver physical address should be 1.0.>0. Use the default IP Routing Multicast address and IP Port unless these have been changed in the ETS project.

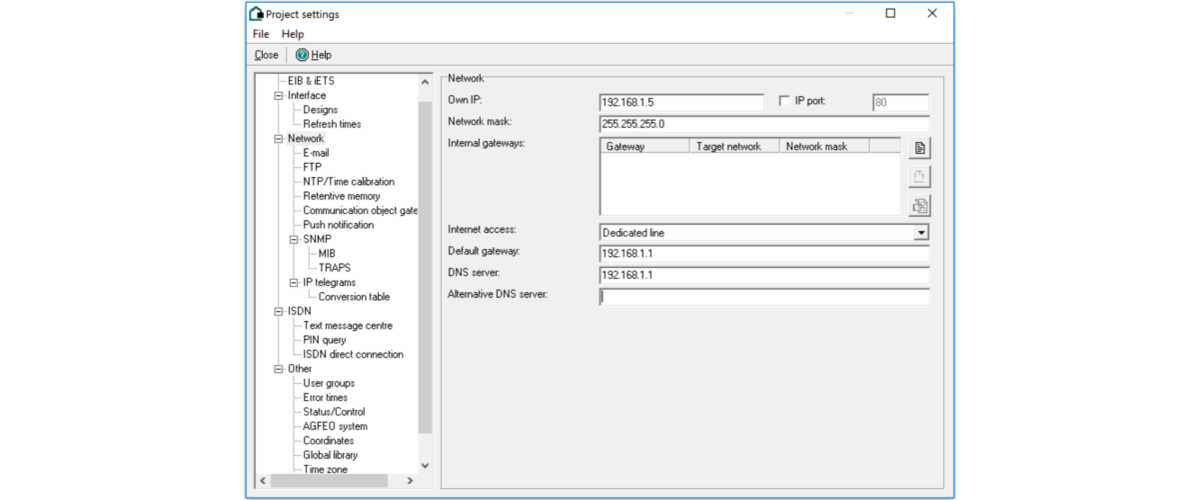
5. Project settings>Network After setting the desired Own IP and the Network mask, access to the internet needs to be configured to enable remote access and NTP time look up. There are various configuration options, the two most commonly used are Dedicated line and Router - Maintain connection (portal).
Dedicated Line
This configuration assumes remote access is managed by the router using a static external IP, a Dynamic DNS service or a VPN. Port forwarding will be required on the network router to navigate the firewall.
- Router: The local router
- DNS Server: Normally the local router
- Alternative DNS server: Not normally needed
Router - Maintain connection (portal)
Here you can link the homeserver to the Gira Portal which provides a Dynamic DNS Service. Port forwarding will still be required on the network router.
- Router: The local router
- DNS Server: Normally the local router
- Alternative DNS server: Not normally needed
- Portal address: The Gira portal address is geraeteportal.gira.de
- Portal password: The password set up in the Gira portal

7. Network>NTP Time/calibration Configure a NTP server to ensure the homeserver has the correct time. The Point in time of calibration (hh:mm) can be set to any time other than 1:00am - 4:00am as this can cause complications during daylight savings change over.
Some commonly used UK time servers are-
- uk.pool.ntp.org
- ntp2a.mcc.ac.uk
- ntp.exnet.com
8. Other>Time zone Set the time zone based on the location of the homeserver.
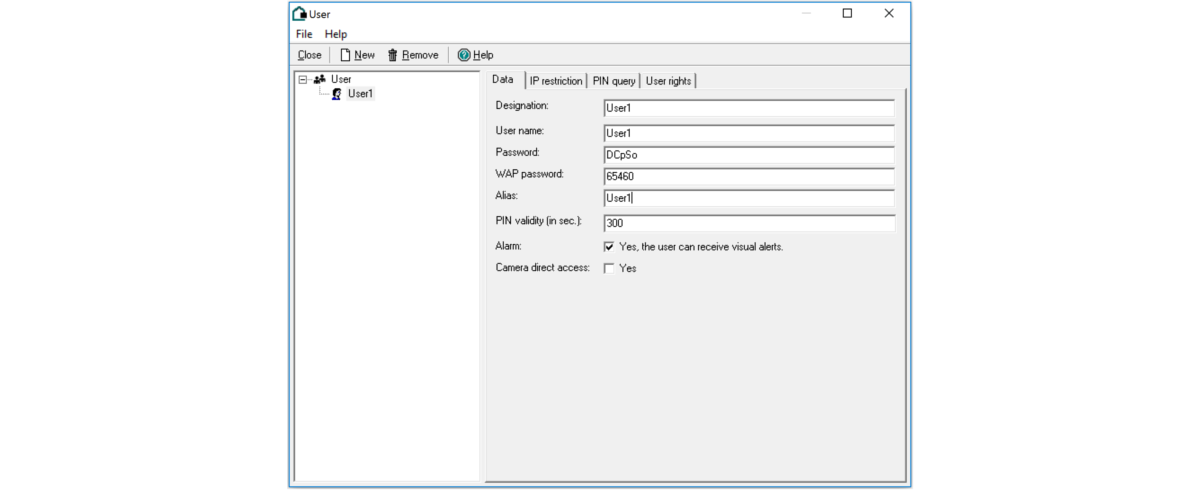
9. After closing the project settings open User from the Master data tab on the left.
10. Create a new user with a unique User name, Password and Alias. This will be used to download to the homeserver and access system lists.
11. Under the User rights tab, List and Administration need to have internal and external access set to password.

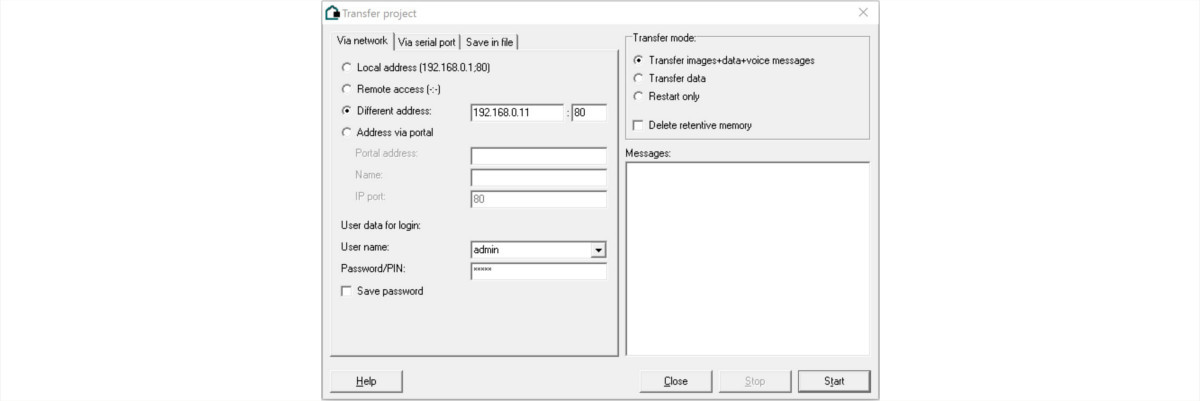
The project can now be downloaded to the Homeserver via the Transfer function on the main menu. Once downloaded, the access details will change to those assigned above, however, for the initial download you will need to select Differant address and use the IP address: 192.168.0.11:80. The access details are:
- Username: admin
- Password: admin

